
Restoring a classic car is about more than looks, it’s about how the car feels when you drive it. Installing a high-quality sound deadener mat is one of the most effective ways to improve ride comfort, reduce noise, and block heat in a classic car. Excess road noise, heat, and vibration can quickly take away from the enjoyment of your build. That’s where Auto Metal Direct’s Silent Drive Pro Sound Deadener comes in.
In this blog, we’ll walk you through the installation process, share some tips, and explain why Silent Drive Pro is one of the best upgrades you can make during a restoration. If you’re already working on your interior, now is the perfect time to install it.
What Is AMD Silent Drive Pro Sound Deadener Mat?
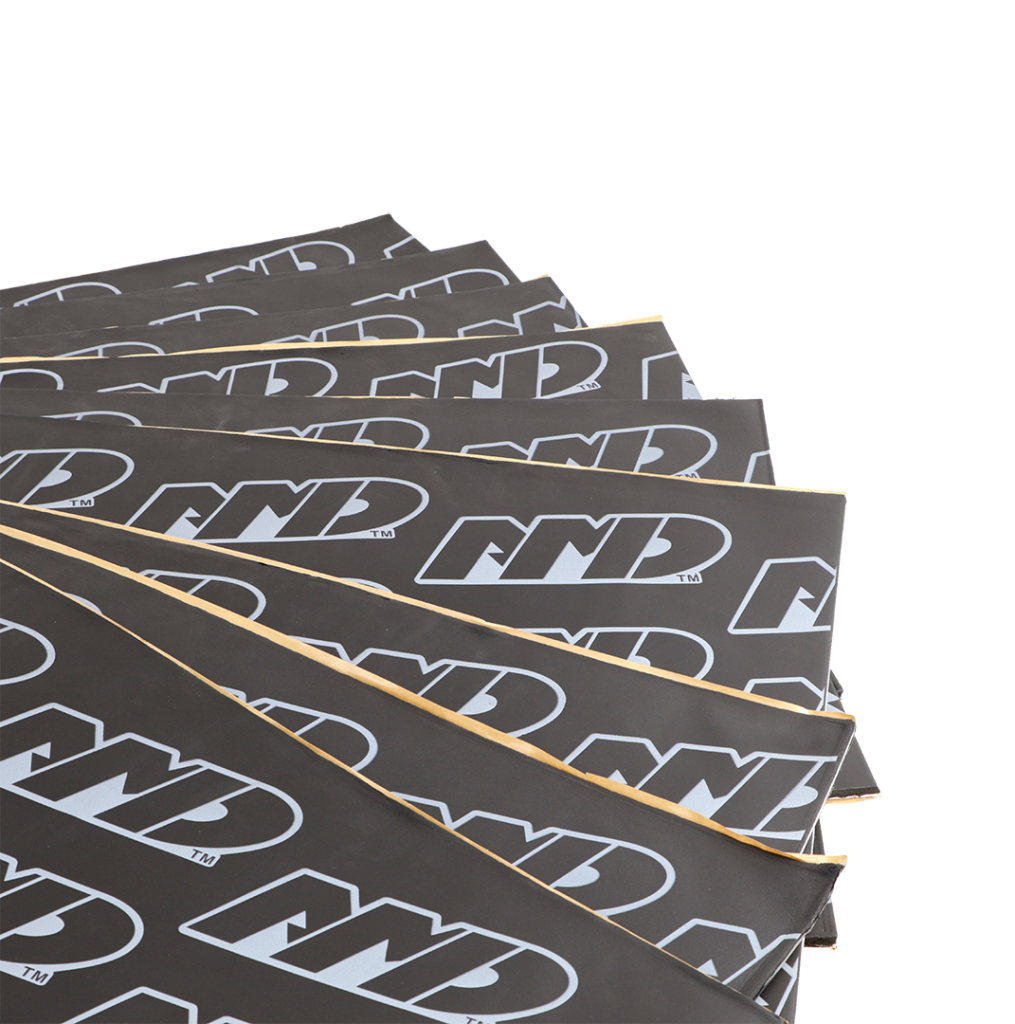
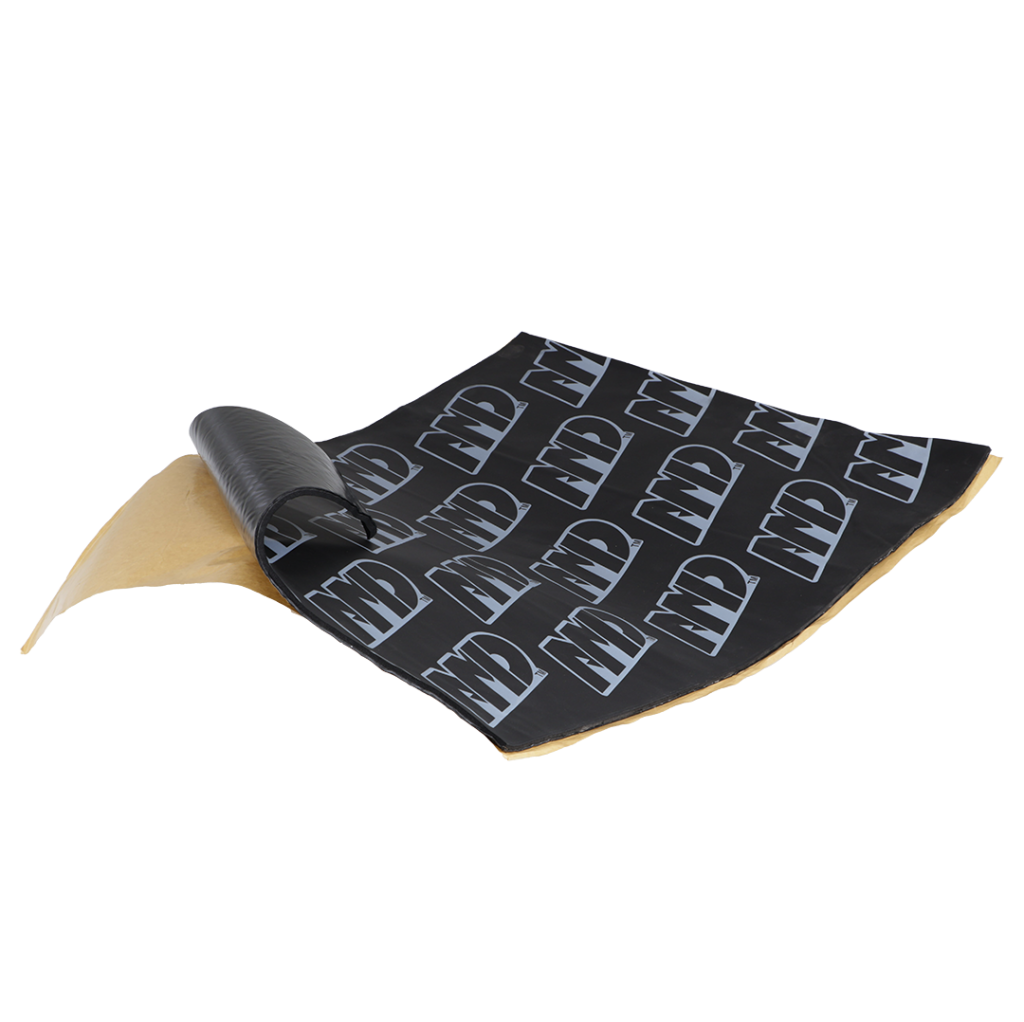
Silent Drive Pro is Auto Metal Direct’s premium sound deadener mat and thermal insulation material. Unlike generic sound mats, it’s engineered to fit restoration projects where originality, performance, and long-term durability matter.
Key benefits:
- Reduces road noise, exhaust drone, and vibration
- Helps block engine and exhaust heat
- Strong adhesive backing for long-term bonding
- Flexible and easy to install on flat or contoured surfaces
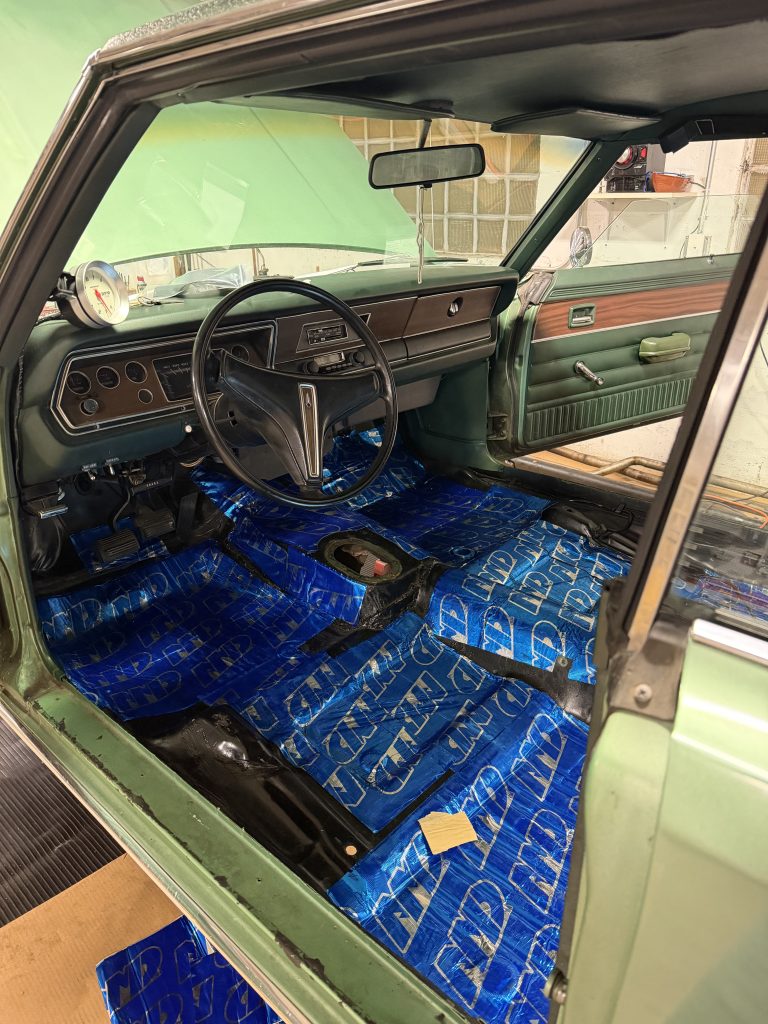
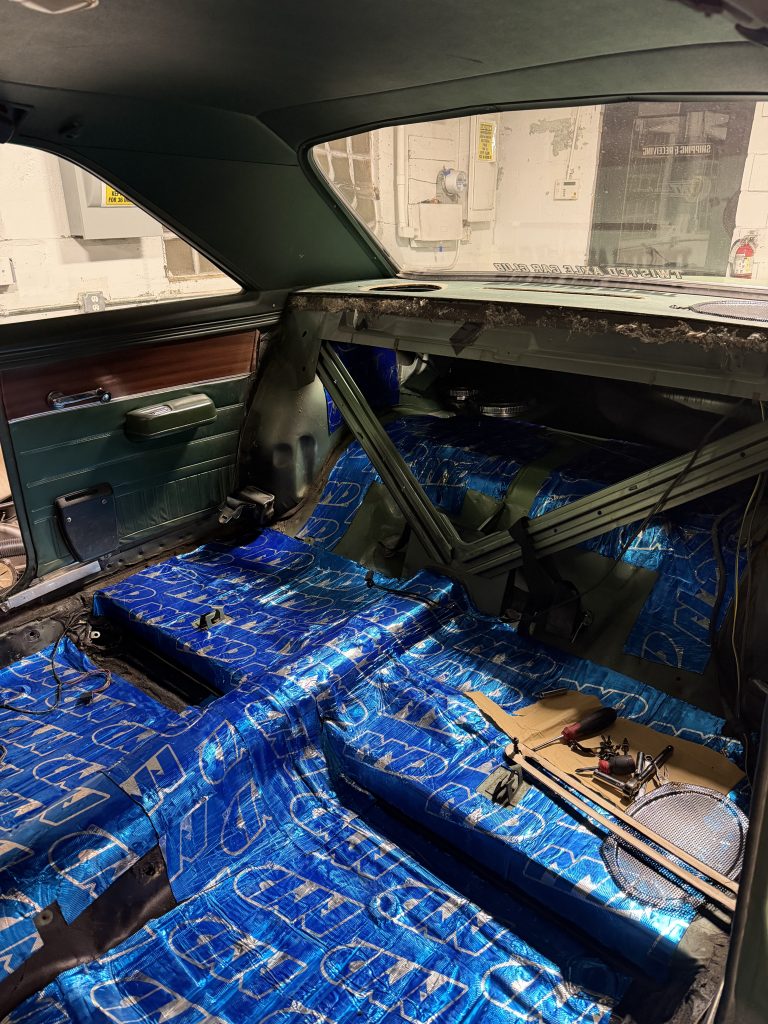
- Ideal for floor pans, firewalls, doors, roof panels, and trunk floors
When Should You Install a Sound Deadener Mat?
The best time to install Silent Drive Pro is before your carpet, headliner, or interior panels go in. If your car is currently stripped or mid-restoration, this is a no-brainer upgrade that pays off every time you drive.
Common installation areas include:
- Floor pans
- Firewall
- Doors (inner skins)
- Roof panel
- Rear seat area
- Trunk floor and quarters
- Inner Wheel Houses
Tools & Supplies Needed
You won’t need anything exotic to install this sound deadener mat. Most installs can be done with basic shop tools:
- Utility knife or heavy scissors
- Clean rags
- Roller tool (recommended for best adhesion)
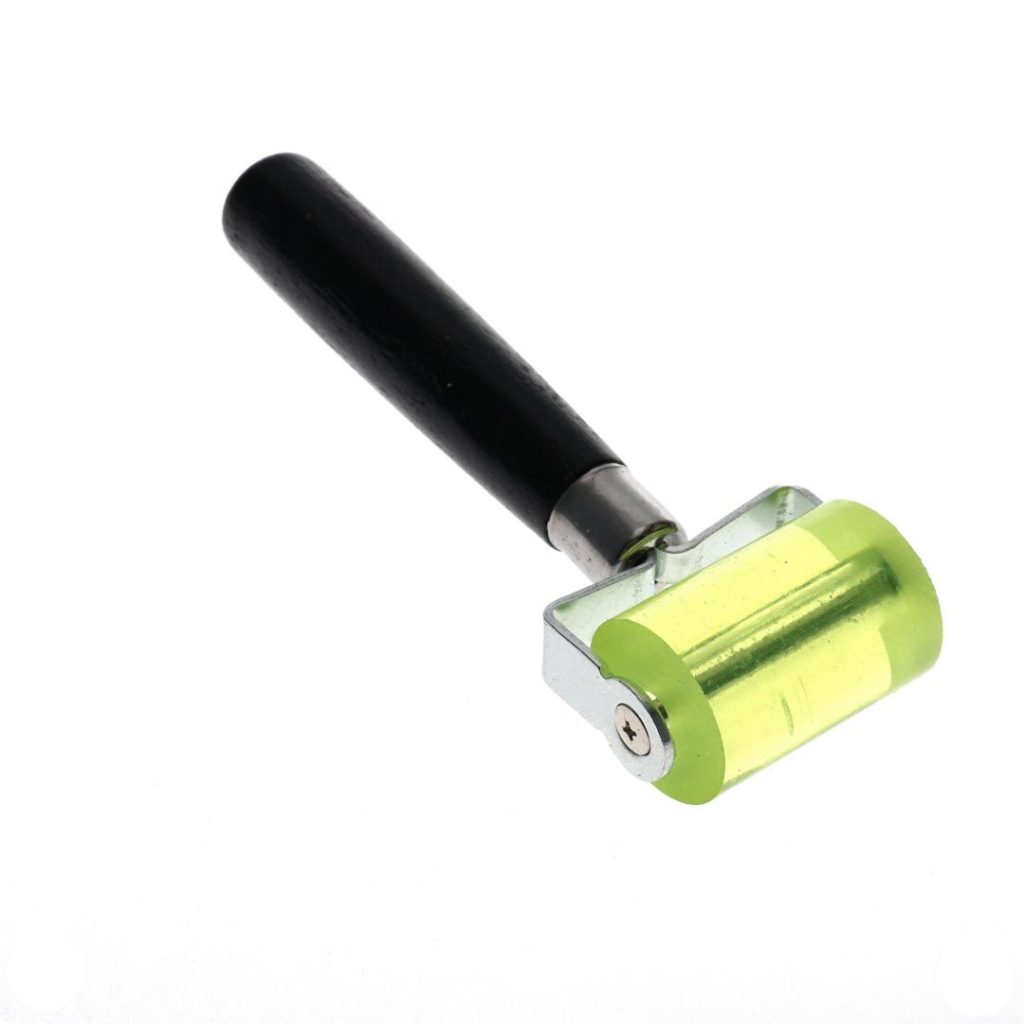
We recommend a roller tool with the purchase of any sound deadener.
Sound Deadener Mat Installation Guide:
Step 1: Prep the Surface
Proper surface prep is critical when installing a sound deadener mat. Start by ensuring the metal is:
- Clean
- Dry
- Free of dust, oil, rust, or grease
If there is any surface rust on your floor, we suggest sanding or grinding it down to bare metal and coating the surface in a rust encapsulator. Be sure the floor is completely dry and clean before laying down any sound deadener as any contaminants can affect adhesion.
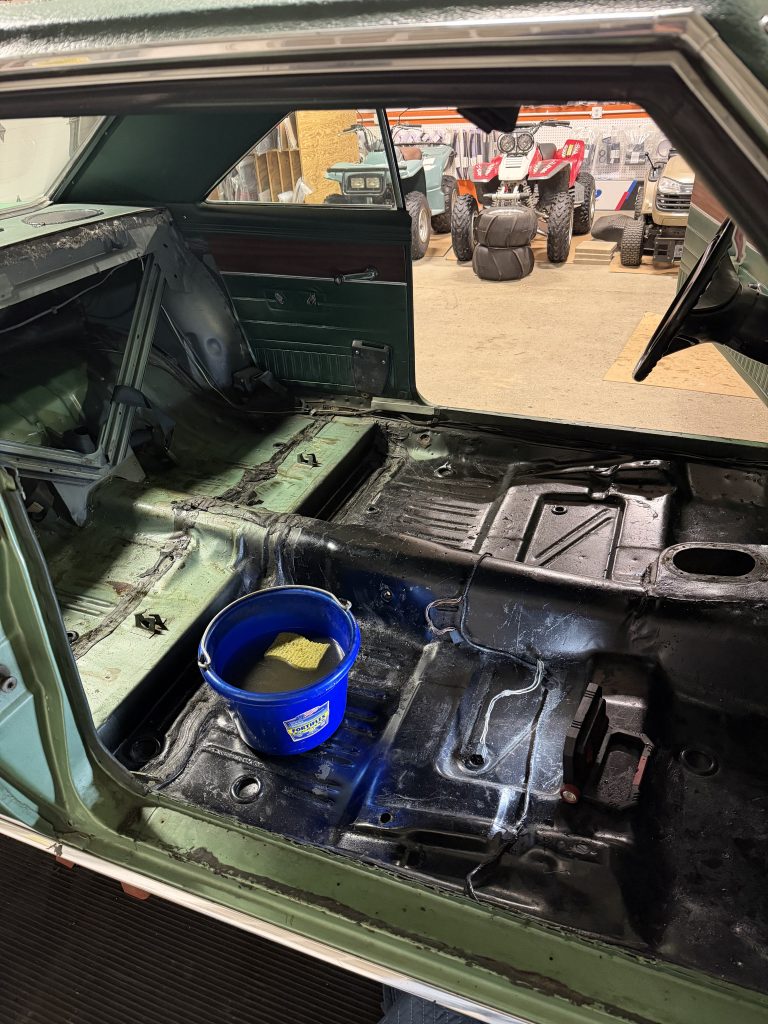
A bucket of warm soapy water and some rags works just fine to remove all the years of dust and dirt where the carpet once sat.
Step 2: Measure & Test Fit
Measure the area you’re covering and transfer those dimensions to the Silent Drive Pro sound deadener mat sheet. Dry-fit each piece before removing the backing.
Tip: It’s better to install multiple smaller sections than one oversized piece, especially on complex contours.
Step 3: Cut to Size
Using a utility knife or scissors, cut the sound deadener mat to fit your marked measurements. Silent Drive Pro cuts easily and doesn’t fray, making it simple to work with. Be sure to wear gloves while handling and cutting the mats as the edges become very sharp.
Step 4: Peel & Apply
Slowly peel back the adhesive liner and press the sound deadener mat into place. Start at one end and work your way across to avoid trapping air.
Press firmly by hand to tack it down.
Step 5: Roll It Out
Using a roller tool, apply firm pressure across the entire sound deadener mat surface. This step ensures:
- Maximum adhesion
- No air pockets
- Proper bonding to contours and seams
This is where Silent Drive Pro really shines, it conforms extremely well to factory stampings. If the roller tool is too bulky to get in certain corners or grooves, we found it helpful to use the handle of a box cutter to smooth out air pockets.
Step 6: Repeat for Remaining Areas
Continue installing Silent Drive Pro across all desired surfaces. Many builders choose to fully cover:
- Front and rear floor pans
- Firewall
- Transmission tunnel
- Rear seat platform
How Much Coverage Do You Need?
Coverage depends on your vehicle and how extensive you want to go. Full interior coverage will provide the best results, but even partial coverage in high-noise areas can make a noticeable difference.
If you’re unsure how much material your project requires, we’re happy to help you calculate it. Typically, one box of 10 sheets provides adequate floor pan coverage on a 2 door classic car.
Why We Recommend AMD Silent Drive Pro Sound Deadener
We’ve seen and handled a lot of sound deadeners over the years, and Silent Drive Pro stands out.
- It sticks
- It lasts
- It installs cleanly
- It makes a real difference
Whether you’re building a driver or a show-quality restoration, this is one of those upgrades you’ll appreciate every time you shut the door and hit the road.
Order AMD Silent Drive Pro Today
If you’re ready to make your classic car quieter, cooler, and more enjoyable to drive, AMD Silent Drive Pro sound deadener mat is an upgrade worth doing right the first time.
👉 Available now at TNT Auto Parts – Click HERE to browse our selection of sound deadener mats and accessories.
Have questions about fitment or coverage for your specific vehicle? Contact us — we’re always happy to talk classic cars.